Saturday, September 24, 2011

Enjoy the Ride !


  • Sentiment and embellishment are Cricut Cutouts Graphically Speaking and Street Sign
  • Ink is Memento and Copic Markers and Airbrushing
  • Cryogen white cardstock, with black and brown layering
  • Stamp vendor unknown, please let me know if you recognize it.
Enjoy the Ride, Bob!
A dear friend of our family has retired and I created this card to send him off on a joyful journey of fun and relaxation.  Bob loves trains.  He belongs to a train club in northeastern Ohio.  He and his wife Linda have traveled the U.S. to see train exhibits, track engineering phenmonen through mountain passes and view other train memorabilia that exist in our countrysides.  Bob is an industrious fellow and a few years of ingenuity, elbow grease and tender loving care with nuts, bolts and steel plates out in the family barn has resulted in a small scale model train that is large enough to ride.  My husband and I have had the pleasure of a twilight train ride through the woods on a moonlit night on Bob's treasured train.  Bob's wife Linda says that she finds the evening rides so restful.  I would have to agree.  Thanks Bob, we enjoyed the fruits of your hard work!

Saturday, September 17, 2011

Happy 100th Birthday Aunt Mary!

  • Memento Dye Ink
  • Copic Markers and Airbrushing
  • Cricut Cartridge "A Child's Year
  • Spellbinders Corner Die
  • Stampendous background stamp
  • Rubber Stamp Tapestry Butterfly
  • Sentiment -unknown
  • Black and White Photo
The card and 1st layer were cut with the Cricut cartridge then stamped with a roller (unknown)  and a Stampendous Faux Finish Quad  cube.  I airbrushed the edges with Copics. The picture is edged I with the Making Memories Distress Edger  The picture is a black and white of me that I colored and air brushed with Copic markers.  This was my first attempt at coloring a black and white photo and I have to say it is an amazing experience. It is like coloring the best rubber stamp image ever created.  I just couldn't believe the way the skin looked so natural.  I do see where I could have done better, but all in all, I though it came out well.  Copics blend so nicely.  Another item worthy of note, is that I did this on regular cardstock that you buy for your computer printer.....the cheap stuff, and it blended and absorbed nicely, no blurring of computer ink (I have a Canon). 
Copics used:
  • Card background and Layer E31, E55, E25, E27, E13 (love this one), E37, E55, E19
  • Skin E00, E02
  • Hair Y21, E00, E31, 0, E40
  • Butterfly stamped with Memento Tuxedo, E00, E13
  • Birthday Cake E00, E25, RV13, Y08, YR16
  • Wash Tub E40, C0, C2
  • Air Brushing edges and corners of card E13, E31, E35, E25, E27, E19

Happy Birthday Aunt Mary!
When I was a little girl, we used to go on vacation in July and frequently we would visit the Cook family who lived on a farm in Chattanooga TN. The Cooks had raised a very large family of 6 children who were married with children of their own by the time that I became one of their visitors.  Their household was always active with lots of people around doing fun things.  I tasted fresh cows milk there for the first time. OH! and chocolate gravy too!  Those visits to the Cook farm were a highlight of my childhood.  Theirs was a faithful Chrisitan family and spending time with them increased my faith as I noted the good examples that they modeled.  It just so happened that my birthday fell in the middle of a few of our visits and one one particular visit, my loving Great Aunt Mary asked me what kind of cake I would like her to bake for me. Of course, there is only one kind of cake to my three year old mind (and yet today) and that is chocolate! Aunt Mary baked me a chocolate cake several times for my birthday. Part of the birthday ritual at the Cook household was to go outside in the yard and turn the wash tub upside down and set the toddler on it to take their birthday picture. This year it is now time for Aunt Mary's birthday and she is 100 years old!! Aunt Mary's heart will truly stay young because she has such a loving heart. And doesn't she look great too! 

Friday, September 16, 2011

Button, Button, Whose Got the Button?

Today's card is for Lisa Somerville's button blogger challenge.  You too can participate in the blog hop ! (see instructions below)
Dye Inks: Memento
Chalks:  Colorfin Pan Pastel
Stamps:  Rubber Stamp Tapestry, Beeswax, Gray Wolf Graphics
Dies: Nestabilities
  • started with white cardstock and layered a light coat of pink Pan Pastel chalk over the white card front. 
  • Stamped a square in the middle of the page with a lace stamp from Rubber Stamp Tapestry by repeating it four times in a green Memento ink. 
  • Stamped around the edges of the square with the same lace stamp in a purple memento dye ink pad. 
  • Stamped the dress makers form (Beeswax) and buttons (Rubber Stamp Tapestry) in black. 
  • Stamped the dress maker's form with the ruffled dress (Beeswax) with purple Memento ink on a separate piece of white card stock chalked first with pink and then with purple Pan Pastels. 
  • Fussy cut the dress form with the dress and placed it on the card with pop dots. 
  • Colored whiet lace left over from son's wedding invitation with the Pan Pastels and secured it with adhesive. 
  • Embossed sentiment with detailed black Color Riser embossing powder on a pink Pan Pastel chalked white cardstock.
  •  Layered sentiment over purple cardstock cut with a Nestabilities die from Ribbon Tags.

Saturday, September 10, 2011

Starry Starry Night and Air Brushing

Today the Stampin Chix met for our monthly gathering.  We had a good time stamping and scrapping with each other. The theme for Lisa Somerville's blog challenge this week is STARS.  She left it open for interpretation, hollywood stars, or stars above, I suppose even starfish could qualify.  I chose the kind you see at night.  Starry, Starry Night was created with Stampscapes, Copic markers.  I did some airbrushing on this one too.  The ease of air brushing is one of the greatest things about Copic markers.  I enjoy that it is not messy or smelly and you can get that "just right" look that you are by blending the colors with the airbrush.  It is also fast and easy to change from color to color in the air brush gun.  Air brushing is especially great for skies and grass.

Monday, September 5, 2011

Monochramatic Blues Blog Challenge

This card was created for the Monochromatic Blues Blogger Challenge.  I haven't worked very much with blue, so this was truly a challenge!  The stamps are from Our Daily Bread Designs and are colored with Copic Markers.  They are fussy cut and placed on the ovals cut from Nestabilities. The sentiment was embossed.  I like the design of this stamp set as it seemed meant to frame an oval so nicely.

Saturday, September 3, 2011

Christmas Advent Calendar

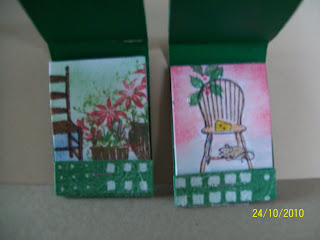
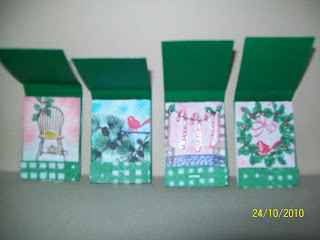
I have been meeting with a group of ladies called Stampin Chix for quite a few years now.  At Christmas time we have a secret gift exchange.  We each list 3 Rubber Stamp sets that we would like to have and then exchange names.  When you recieve the list of your partner you choose one or two sets (we set a $30 limit) and then you purchase those sets and make 3 items using the rubber stamp set.  The purpose is to give the giftee some ideas of what can be done with the stamp set.  Last Year I chose the Stampin Up set "Have a Seat" and "Aviary".  I came up with the idea of an advent calendar with the title "Christmas Chair".


 I used the Sizzix matchbook cover die and cut out 25 of them, then stamped the inside and placed them on a cute paper that I found.  I apologize for the blurry pictures, I had not discovered the proper way of focusing with this camera yet and was having a difficult time.  The rest of the pix are kind of fuzzy and maybe not for those of you with a queasy stomach, but maybe you can get the idea.  This project was a lot of fun as I pulled out all of the tiny stamps that I owned and used the largest variety of stamps of any project that I have ever made.  I used the Tim Holtz tiny attacher to staple the inside card to the matchbox cover.   It was challenging to create little vignettes of the tiny chairs and come up with so many different Christmas scenes.  All in all it was a very fun project and I used many stamps that I had not used before.

Love Card

Last month Stampin Chix met and we made some awesome cards. So far, the only pictures I have are of the card that I made. I was trying the new Paper Blossom punches from McGill. These punches are designed to make three dimensional flowers. They were a big hit with me and I expect that you will be seeing many more of them adorning my paper crafts in the near future!  The belly band was made with a Martha Stewart punch.

The word love was cut with a Cricut cartridge.