Showing posts with label Big Kick. Show all posts

Thursday, May 14, 2015

Flippin for Flip-its!These

I started designing these cards in February wehn the Stampin Chix were supposed to meet.  Unfortunately, the weather was bad on the day that we were to meet and so I didn't get to make them that day.  February was so dreary that I think I was yearning to work with some bright and cheerful colors.  I got my chance in March when I made a trip to Florida and had a little extra time to put these cards together.  They are made with the Sizzix Flip-its die cuts and Graphic 45 paper.  I like that the Sizzix dies not only have a die to cut out the card itself, but they also come with dies for the layers on the card.  Fabulous!!  Now if they would just add another layer or two, they would be perfect!  My chicken is looking kind of streaky here.  Not sure why and I don't recall that it looks that way in person.  I will have to take another look at it and maybe do some blending.  That is one of the reasons why I like to blog.  Seeing the picture on the computer screen helps me critique my work.  The Copics are really great too in that you can go back long after you have finished a project and rework the blending.

The images and sentiments are from Artistic Impressions and are rubber stamped with Ranger Archival ink.  The orange daisies across the top are a Martha Stewart Punch.  Those were not on the original card, but some adhesive ran amuck and I had to do some damage control.

I picked up the dimensional embellishments at Joanns.  I'm not sue what the brand is.


Love this cute little owl guy!  Overall, I give the Flip-its a thumbs up and five stars.  These cards went together very quickly with no measuring.  They also come in a little plastic durable pouch so that you don't have to worry about losing all the little pieces.


Thursday, November 3, 2011

Butterfly Days

Butterfly Days!


I made this card on Saturday at our Stampin Chix gathering.  I know it is a little bit out of season, but I had just bought some new dies and couldn't wait to use them!  I attended the Adventures in Stamping fall convention in Strongsville Ohio last Saturday. I spent quite a bit of time at the Our Daily Bread Designs booth.   http://ourdailybreaddesigns.com/ 

Our Daily Bread Designs has been my favorite place to shop this year.  They have a large selection of beautiful scripture stamps and their gallery contains the most beautiful cards I have ever seen!  This is the place to shop if you want to give the gift of God's Word.  You will find an array of Biblical passages in beautiful fonts and beautifully illustrated stamps to accompany them.  ODBD also has stamps that frame the scriptures and are compatible with many of the Nestabilities dies.  ODBD carry Nestabilities and Cheery Lynn die cuts. 


Cheery Lynn die cuts are very intricate and beautiful.  I used them for the Butterfly Days Card.


 The vine and butterfly on this card are Cheery Lynn die cuts. 
The Cheery Lynn Fanciful Flourish vine is in the middle.
The red flowers on the card are made with Cuttlebug Quilling Rose Carnation set.  I cut them out with the Sizzix Big Kick. The center of the flower is a long strip of paper which you roll onto a quilling tool. The flower petals die cut cuts out a straight long series of petals that are connected. You cut them out and then roll them on a quilling tool around the center cut. I used Copics on red card stock to outline the edges and centers of the petals for added dimension to the flower. 
Package with Directions

Die Cuts, Quilling Tool and Stems
Stack Acrylic bottom plate, then paper, the die cut.
Place acrylic mat on top and wind through Sizzix Big Kick


Cut out Flower Center

Long strip of flower petals and center flower strip with quilling tool.


Roll the Flower Center onto the Quilling tool.

Outlined edges of petals with Copic Markers R37 and R39.

Add Color with Copics around the edges and in the center of the petals.


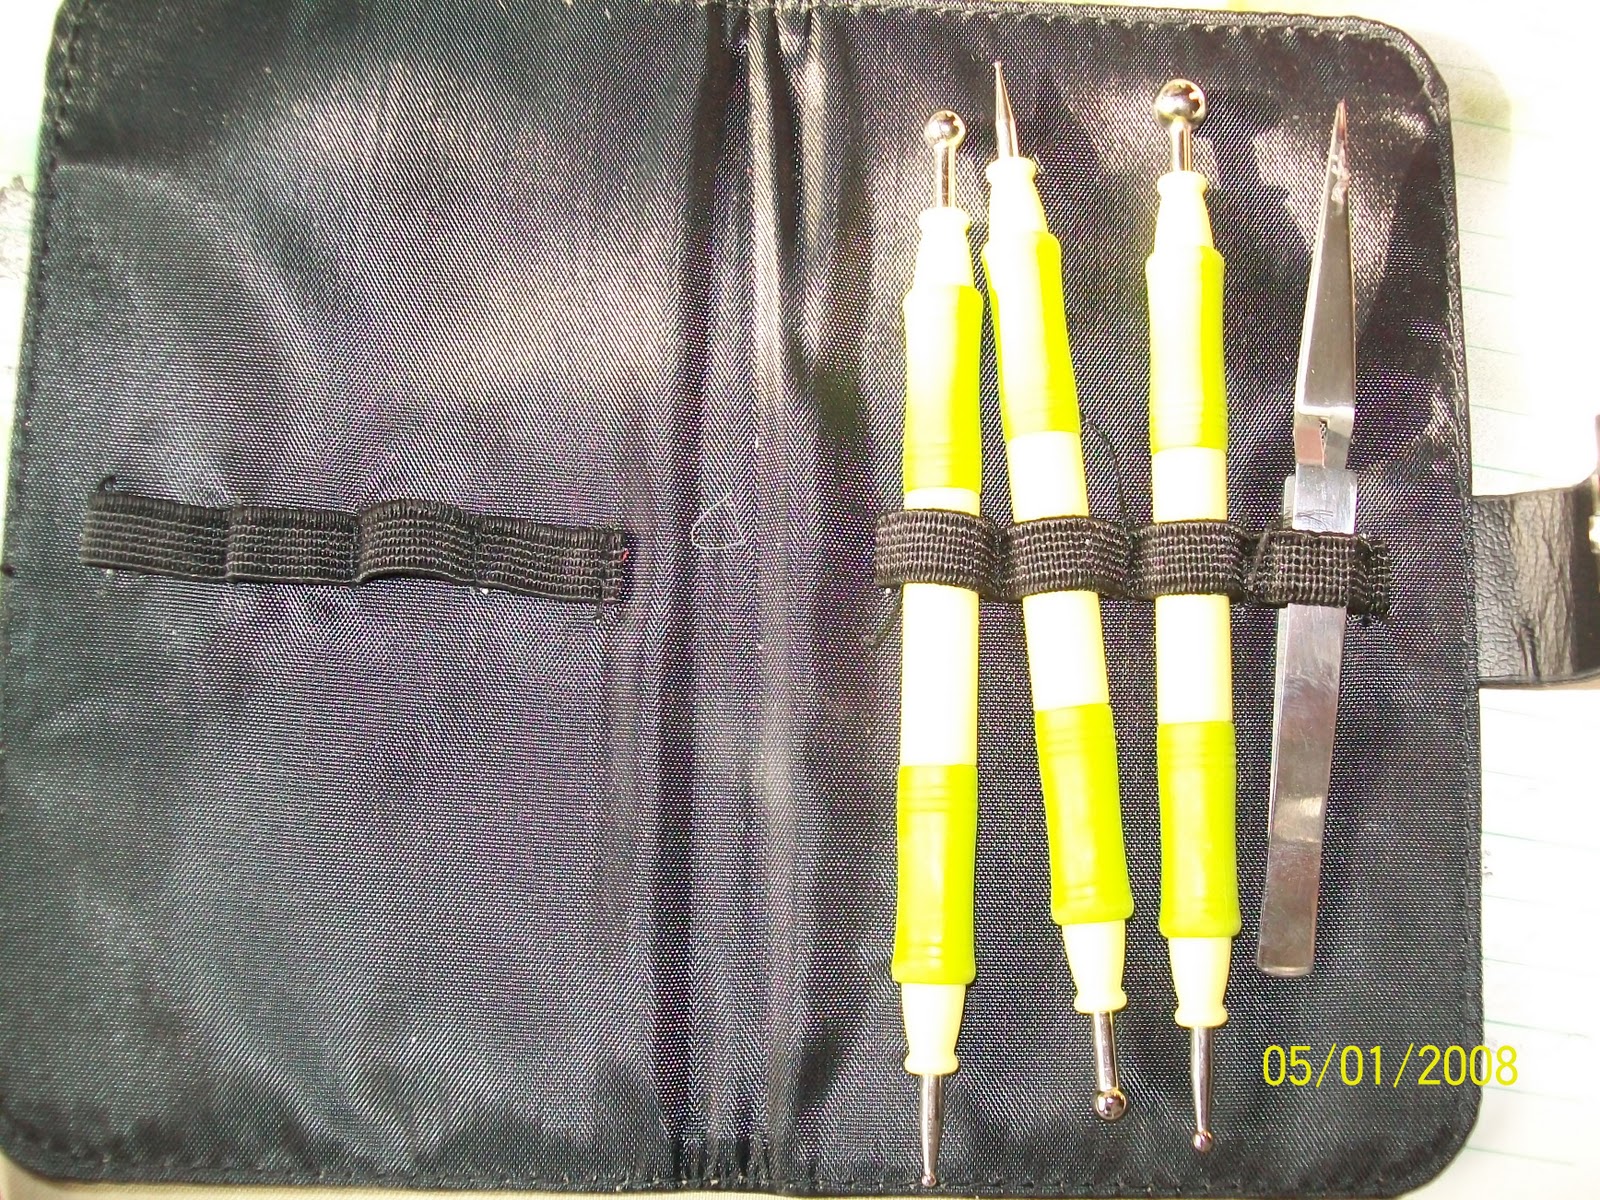
McGill Tools are for molding, pinching and curling the leaves and flower petals.  They are best used with the special foam mat that is made with just the right thickness for this task.


Using the medium size tool roll the ball in the center of the petal allowing the petal to curl.

Using the tweezers, grasp the flower petal at the center.
Pinch the petals around the tweezers.

Grab the petal and roll the sides toward the tweezers.

Fold down the edges of the petals.
Roll flower petals onto flower center, dab with a bit of glue.


Continue rolling flower petals onto petal center

Use a quick drying glue to dab a little on the edge of the final roll.
Peel the petals down from the flower.


Add leaf veins with stylus.

Glue Leaves to flower


Add Glimmer Mist

Martha Stewart Double Edge Linked Trim Punch
Paper woven through punched trim.

The border is a Martha Stewart Double Edge punch called "Linked Trim".  I added color and interest by weaving a strip of turquoise paper through it.  The die cuts are placed on a background of the swiss dot Cuttlegbug embossing folder with a turquoise mat.